Create an interactive timeline
with Tiki-Toki Timeline Maker
Timelines created using Tiki-Toki are fully interactive experiences. Here, we explain what makes Tiki-Toki timelines the most interactive on the web.
This is not a static image. This is a fully interactive timeline. Try interacting with it.
In the early days of the web, websites were little more interactive than paper pages. Sure, you could scroll down to view content below the fold or click on links to get to new pages but this was - in essence - not much of an advance on turning the page of a real book or newspaper.
It wasn't long before ingenious developers started allowing users to contribute to websites via forums and comments. But even then the experience wasn't exactly seamless. For example, you'd submit a comment, wait for it to be saved to a database, have a cup of tea, and then wait for the page to reload again. Yes, that was interactive in a limited sense. But only in the same way as sending a letter to a newspaper for publishing is interactive.
It was arguably not until the arrival of Macromedia Flash in 1996 that the web started to become truly interactive, with web users suddenly being treated to fancy animations and pages that did not require a reload when a button was clicked. You could even play rudimentary games in your browser. In the years that followed, interactivity blossomed in what some believe to be the web's greatest period of creativity.
Sometimes that creativity went too far. People began to hate the slow-to-load and unnecessary Flash animations that greeted them on their visits to websites. And, in time, Flash got a bad reputation and its use declined, as website owners moved over to using web standards technologies such as Javascript, CSS and HTML5.
These are the technologies that we used to build Tiki-Toki Timeline Maker and, as we hope this article demonstrates, they are just as capable as Flash at achieving interactivity.
Tiki-Toki's timelines are designed to be played with as well as to convey information. They are not therefore simply static images or web pages, like what many of our competitors offer. They are fully interactive experiences. The user is encouraged to interact with the timeline, to find out more about a particular event, play a video or navigate to a different period in time.
This has significant benefits. People who are taking part in an activity are far more likely to remember it than someone who is just passively staring at a static page. For the younger generation, who have been brought up on computer games and YouTube, this is likely to be especially true.
So exactly how interactive are timelines created using Tiki-Toki? Well, to answer that question, we have compiled a list of ten things that make timelines made using Tiki-Toki the most interactive on the web. Once you have read about them, why not get started creating an interactive timeline of your own.
1. Five ways to move through a timeline
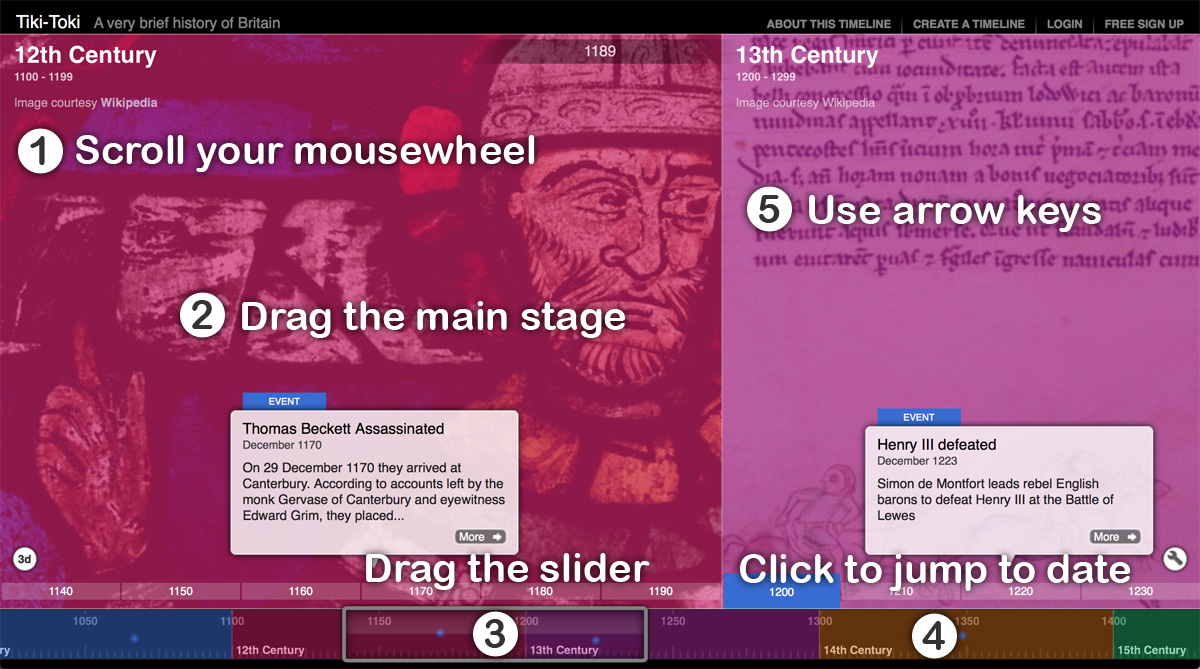
Infographic showing five ways users can move through time on a Tiki-Toki timeline
Yes, that's right, Tiki-Toki offers no less than five ways of navigating through time on a timeline. You can use your mouse scroll wheel or trackpad. You can drag the main stage area (either with your mouse or finger if you are using a touch screen device). You can use the dragger in the navigation bar at the bottom of the timeline. You can click in the navigation bar to animate the timeline to the specified date or time. Finally, you can use your keyboard's left and right arrows to navigate between the stories on the timeline.
2. Click on events for more information
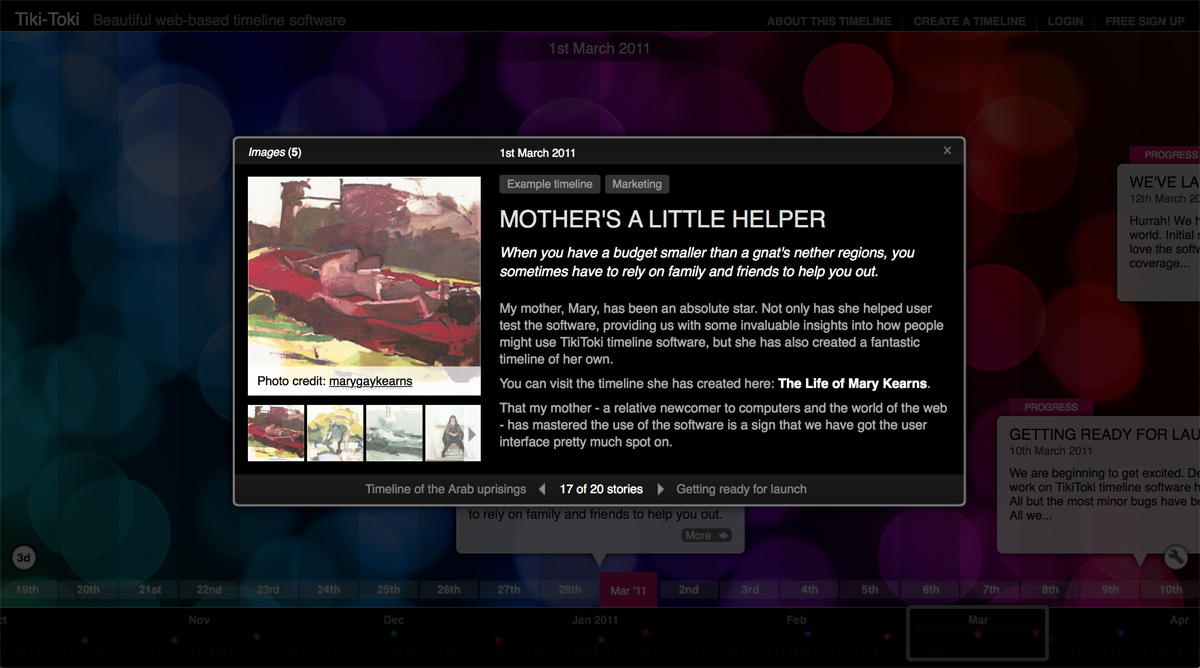
You can click on an event to open up a content panel showing media and more information
Sometimes you have a lot of information for a particular event or story. It would be impossible to display all this information in a story bubble on the timeline. That's why Tiki-Toki provides a larger content panel to display the full information about an event or story. This panel can include text, images, audio and videos. To display the content panel, simply click on an event's 'more' button. Closing the content panel will return you where you were on the timeline, without any need for the timeline page to reload.
3. Expand images to take a closer look
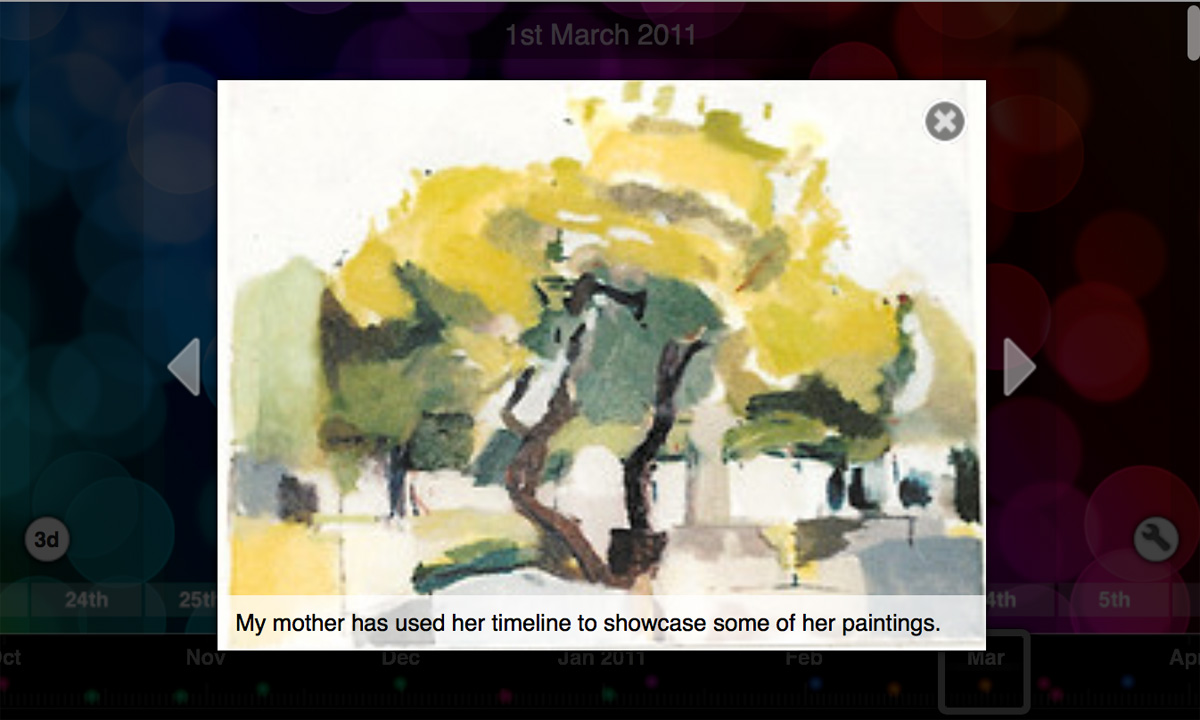
You can expand an image in the content panel by clicking on it
Once great thing about a story's content panel is that it automatically creates a gallery of any images you have added to the story. You can scroll through these images. Or click on the image to view a larger version of the image. We are particularly proud of the animation that fades out the panel and expands the image. Try it. We hope you will like it too.
4. Play videos and audio within the timeline
The story's content panel can also be populated with videos and audio. Select the video or audio options in the content panel's media menu, and then you can start watching a video or listening to audio from within the timeline. When finished, simply close the content panel to return to where you were on the timeline. Tiki-Toki supports embedding videos from popular video hosting platforms like YouTube, Vimeo and DailyMotion. You can also play MP4 video files hosted on your own servers. For audio, we provide integration with SoundCloud. You can also play MP3 files from the web or your own servers.
5. Switch between our 3D and 2D views at a click of a button
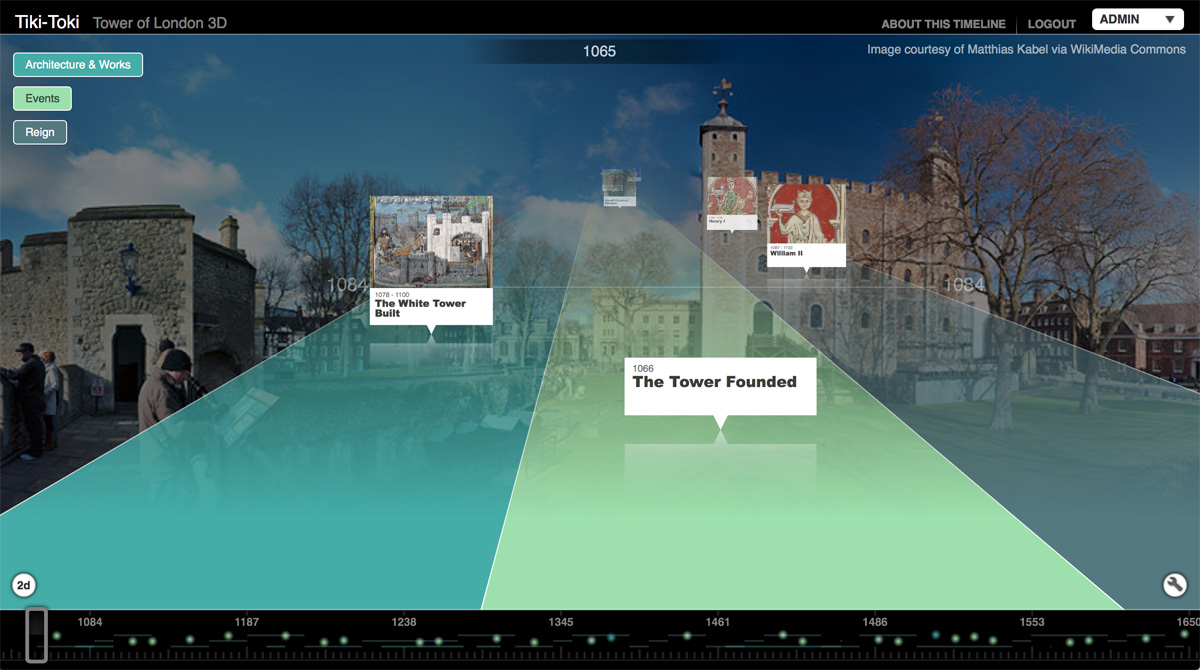
You can switch between 3D and 2D versions of your timeline by clicking on the round icon at the bottom left
Our first person 3D timeline view, which we launched in 2013, has proved very popular among timeline creators. It has even been imitated by Google - see our list of amazing timeline designs. Given the complicated 3D Maths involved, surely it must be tricky to switch between 2D and 3D version of a timeline. Not at all. Simply click on the little 2D/3D icon at the bottom left of your timeline, and in an instant the timeline is updated.
6. Zoom in and out of the timeline
At the bottom right of Tiki-Toki timelines, you can usually find a little spanner - or tools - icon. Click on it and a panel animates in offering a number of useful options, one of which is the ability to zoom in or out of your timeline (please note this is only available for 2D timelines). There are several different zoom levels. Experiment with them to find out which works best for you.
7. Search events
Although we are keen to make Tiki-Toki timelines as interactive as possible, we also recognise the most important function of a timeline is to convey information. Some of our interactive features therefore are aimed at aiding that. Our search options - available from the panel opened by clicking in the tools icon - allow you to find events matching a search terms. This is particularly useful for timelines packed full of lots of events and information.
8. Filter events by category
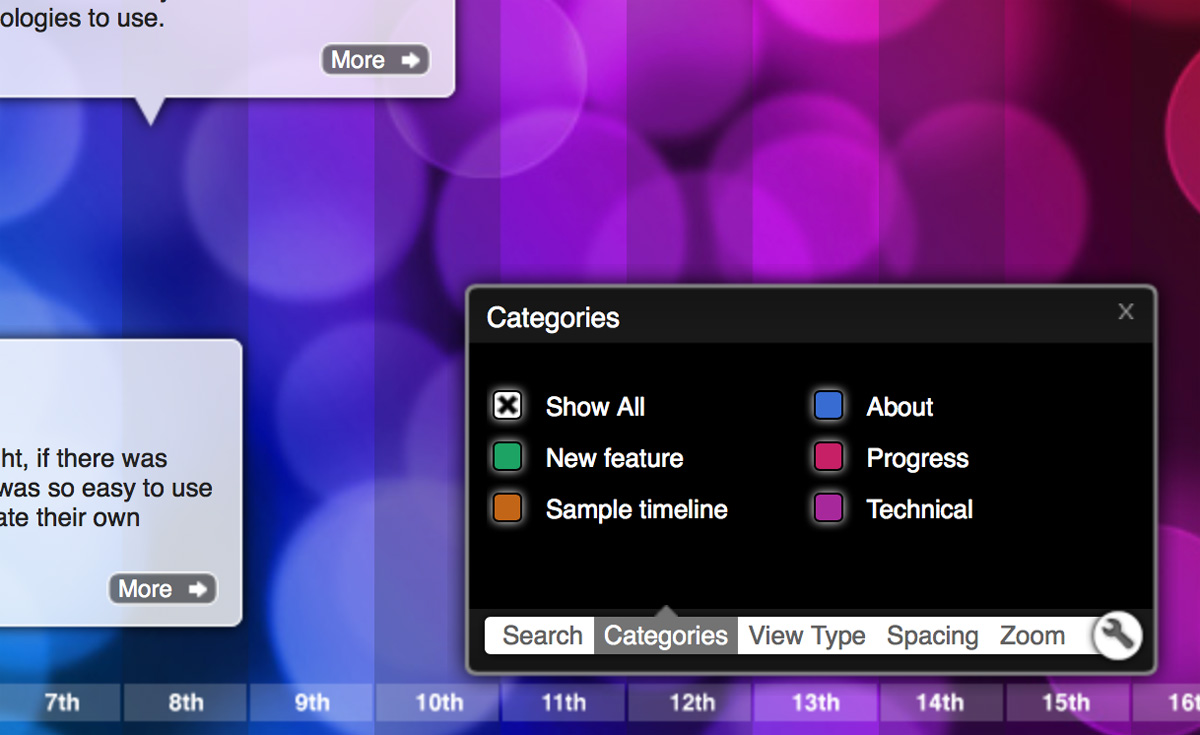
The tools panel includes lots of useful options, including filtering by category
Another useful option available in the tools panel is our category filter. Tiki-Toki allows users to assign stories to different categories. The categories can be used to color-code the stories or even display the stories in different bands on the timeline using our Category Band view. The category filter allows you to select which categories to display and which to hide.
9. Change the timeline's view design and spacing
Tiki-Toki offers a number of different ways of displaying your timeline data. In addition to the Standard timeline view, you can choose our Category Band view (which splits the timeline into vertical bands for each category), our Colored Stories view (which colors stories the color of the category they are assigned to) or our Duration view, which displays events as duration bars. Tiki-Toki allows users to switch between these different view in the tools panel. Simply select the view you want, and the timeline will automatically update to the new view without the need for a page reload.
10. Filter events by tag
Users of Tiki-Toki can also filter events by tag at the click of a button. You can create multiple tags on a timeline and assign them to stories. The tags appear in a story's content panel, where users can click on them to filter the timeline by stories that have the same tag.
Conclusion
By including such interactive features, Tiki-Toki timelines encourage people to get really involved in your timeline content. I hope you agree that Tiki-Toki is one of the most interactive timeline makers available on the web. If you'd like to create your own interactive timeline, please visit our home page and sign up for a free account.
If you have any questions about creating interactive timelines with Tiki-Toki Timeline Maker, please get in touch by email at blog@tiki-toki.com. You can Keep up to date with the latest Tiki-Toki news and developments via Twitter, Facebook and our blog.