Did you know how to: Format dates, part 1
14th Feb 2014 | Tasha G
If ever there was a meaty topic regarding timelines, this is it! We will cover the standard options for date formatting in this blog post. In a later blog post, we'll go over customised date formatting options.
First of all, you can set date formatting options at the timeline level. You can also format dates for specific stories which will override the timeline level options only for that story. Let's start off with the date formatting options at the timeline level.
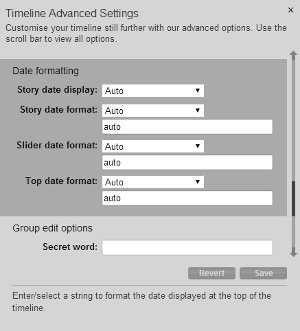
Open your timeline for editing, and go to the 'Settings' tab on your admin panel. Click on the 'Advanced settings' button on the top right. The 'Date formatting' options are close to the bottom of the pop-up panel. Be sure to click 'Save' before closing the 'Advanced settings' pop-up! Each of the four options is explained below:
• Story date display: This determines whether and how the date will display on your timeline story bubbles. There are three options in the drop-down menu: Auto (default option), Hide and Estimate. 'Auto' means the date will display as normal. 'Hide' means that the date will not show on the stories at all. 'Estimate' will make a tilda (~) display before your story dates.
• Story date format: This formats how the dates appear on your stories. There are a number of options on the drop-down menu, starting off with 'Custom' (which will have its own blog post shortly!), 'Auto' (default option) and then moving onto various date and time formats.
'Auto' means the software will determine how to display the date based on a number of settings. If you choose one of the date/time formats, the field below the drop-down menu will populate with the relevant date/time code format, and all your stories will display their date/time in this format (unless specifically overridden at the story level).
• Slider date format: The slider refers to the scroll-area at the bottom of your timeline showing coloured dots or lines for the stories. The drop-down menu options are the same as the 'Story date format', but will determine how the dates/times display only in the slider area.
• Top date format: This refers to the date that appears at the top of your timeline which changes as you move through the timeline. The drop-down menu options are the same as the 'Story date format', but will determine how the dates/times display only for that top date bar.
As well as being able to set the date format at the timeline level, it is possible to use different date formats for specific stories. For example, if your timeline is about a situation changing minute-to-minute, you may want to set the timeline level options accordingly. However, you may want to include a story to kick off the situation from several days earlier and only display the date (rather than the time) for that story.
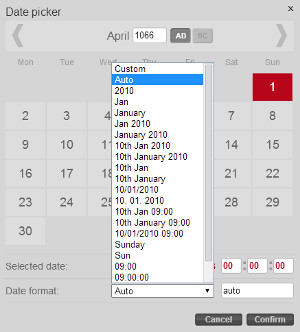
To set a date format for a specific story, first open that story for editing. On the 'Basic info' story tab, click on the calendar icon next to the 'Start date' field to open the calendar and formatting pop-up. It's important to note that regardless of how the date is displayed, you will still need to set a full date and time. Now, towards the bottom of the pop-up, you will see the 'Date format' option. It has the same drop-down menu and options as the timeline level options discussed above. Choose the appropriate option, click 'Confirm' to close the pop-up and then click 'Save' on your admin panel.
That's pretty much all there is to know about the standard date formatting options. However, we do also support some custom date formatting options, so we will write another blog post about those shortly. Watch this space!
If you have any questions about the standard date formatting options, get in touch with us at blog@tiki-toki.com.
Thanks for reading!